Monday, November 12, 2012

Roasted Chicken Tetrazzini

Roasting a chicken is such a great idea; it's easy, price-effective, and delicious.  However, after finishing dinner and loading the dishwasher the next step is to pack up the leftovers, which is when the realization hits - we will be eating roasted chicken every meal of every day for the next week.  Hm.
 
I suppose this realization could be said for a lot of meals that are prepared from a recipe but intended for a two-person audience.  Time and time again I've made recipes that end up being sent with Jim as lunch on consecutive days, and then also eaten for dinner!  Recently I've started making only half of a recipe, which certainly helps with avoiding excess leftovers.  (Why I didn't start making half-recipes sooner, I'm not sure.) 
 
In terms of the roasted chicken, it itsn't possible to only roast half of a chicken so instead I decided to use the leftovers in other chicken-based recipes.  One recipe that I made recently and both Jim and I loved was Cooking Light's Chicken Tetrazzini Casserole.  I kept this in mind as a "make again sometime" recipe for many reasons - the flavor was rich and savory, it was easy to make, having protein plus veges and pasta makes this a one-pan meal, it reheats well and it is relatively healthy.  Given all of these aspects of the tetrazzini recipe, I decided to make it again using roasted chicken.  Throw in the accompanying roasted onions and carrots and this is a great, and delicious, way to use leftovers!
 
As a note: The Cooking Light recipe is actually for 2 casseroles that each serve 6.  Although the recipe describes how to freeze and thaw the extras, I just made one casserole.  The recipe below is for one casserole.
 
Roasted Chicken Tetrazzini (adapted from Cooking Light's Chicken Tetrazzini)
 
1/2 lb dry spaghetti
1/2 tbsp salted butter
1 cup roasted onions and carrots, chopped
1 10-oz package of sliced mushrooms*, chopped
1/4 cup cooking sherry*
1/3 cup flour
1 1/2 cans (21.75 oz) chicken or vegetable broth*
1 1/4 cup grated Parmesan cheese
1/4 cup (2 oz) 1/3-less-fat cream cheese
2 1/2 cups roasted chicken, roughly chopped
1/4 cup bread crumbs
Salt
Pepper
 
*Notes:
- I used Trader Joe's Baby Portabella mushrooms
- Cooking sherry can usually be found in the grocery store near vinegars and cooking wines
- I've used both low-sodium chicken broth and vegetable broth; Trader Joe's Vegetable Broth gave a richer flavor that I preferred
 
Preheat oven to 350 degrees.  Prepare a 2-qt glass or ceramic baking dish by spraying with cooking spray or lightly coating with olive oil.  Set aside.
 
Prepare spaghetti according to package.  When pasta is tender, remove from heat and drain.  Add noodles to prepared baking dish and set aside.
 
Leftover roasted onions and carrots
10 oz package of baby portabellas, chopped


In a medium or large saucepan, melt butter over medium-high heat.  Add chopped mushrooms and cook for 4 minutes.  To the mushrooms, add onions and carrots, salt and pepper (to taste); cook for 1 minute.  Add sherry; cook for 1 minute.
 
Gradually add flour to mushroom mixture, stirring constantly with a rubber spatula.  Cook for 3 minutes.  Continue stirring while gradually adding broth.  Bring the mixture to a boil; after reaching a boil reduce the heat to low and simmer for 5 minutes, stirring occasionally.  Remove from heat and add cream cheese and 1 1/8 cup Parmesan.  Stir until cheeses have melted and are completely incorporated.  Add chicken to mixture and stir to combine. 
 
Potential for making a mess could be high :)
 
Pour half of chicken mixture over spaghetti and stir to mix; add remaining chicken mixture to spaghetti.  Stir all carefully to evenly coat spaghetti and to distribute chicken and veges throughout the casserole. 
 
Make sure the ingredients are distributed evenly
 
Top casserole with bread crumbs and 1/8 cup Parmesan cheese.  Bake casserole for 40 minutes; remove from oven and allow to sit for 15 minutes to cool.
 
I promise it tastes better than this picture looks!
 
Serves 6.  As I mentioned above, this casserole reheats very well so it'll taste just as good if you do happen to eat it once as leftovers ;-)

Monday, October 29, 2012

I Roasted a Chicken, and You Can Too!

Moving to Boston has prompted development of some new habits.  We walk a lot more than we did in St. Louis - walk to the post office, to the grocery, to restaurants; walk Charlie all through the neighborhood and through nearby parks; we walk so much that 2 miles is nothing and we haven't driven our car in more than 2 weeks!  Other habits have been born out of the excess of time I have as an unemployed person - I've been jogging regularly, cooking dinner instead of going out, and keeping the apartment tidy and clean (gasp, shock!).
 
A habit that Jim and I have pursued together is reviewing the weekly grocery store flyer for good deals.  Sure, this habit resulted more from our need to be financially responsible (see reference to unemployment, above) than from excitement or adventure, but its never a bad thing to be more budget-conscious.  I think Jim enjoys looking over the flyer because it gives him input into the snacks he'll be able to find in the cabinets, but I like looking at it because it gives me a chance to try new recipes that'll utilize the weekly sales.
 
One item that has appeared on the sale flyer for multiple weeks has been whole roaster chicken.  The first time this was listed it barely registered to me; cooking a whole chicken seemed like more work than I was willing to put forth.  However, after appearing for the third time I finally decided that roasting a chicken was a challenge I was ready to pursue.  After thorough research into roasted chicken recipes and technique, I decided on a recipe from the most trustworthy source I know - Martha Stewart.  With Martha's Perfect Roast Chicken recipe in hand I embarked on a bird roasting adventure that resulted in the most flavorful, juiciest chicken that I've ever made.  I would certainly recommend attempting to roast a whole chicken as well as this particular recipe; it was delicious and so clucking easy, too! (See what I did there? Ha.)
 
Ding, chicken's done!
 
Whole Roasted Chicken (Based on Martha Stewart's Perfect Roasted Chicken)
 
1 seven- to eight-pound roasting chicken
2 tbsp salted butter
Kosher salt
Fresh-ground black pepper
2 medium yellow onions
2 cups baby carrots, optional
1 lemon
1 head of garlic (approximately 15 cloves)
5-6 sprigs fresh thyme
1 cup low-sodium chicken stock
2 tbsp flour
 
Everything you need, besides the chicken
 
Preheat oven to 425 degrees.
 
Remove chicken and butter from fridge, allow to sit at room temperature for 30 minutes.  During this time, prepare the garlic by diving the head into individual cloves and removing the skin.  To each garlic clove, open/crack slightly by pressing or gently hitting the side of knife placed on the clove.  Peel each onion and slice in half from end to end; slice halves cross-wise into 1/2-inch thick slices.  Rinse lemon under cold water and dry; all over the lemon, deeply pierce with a fork.  Set aside garlic, onion and lemon.
 
The chicken must be rinsed before proceeding with seasoning and further prep.  To avoid spreading nasty chicken germs all over the kitchen, I set up a "prep" station adjacent to the kitchen sink by laying down 2 plastic grocery bags and covering them with two layers of paper towels.
 
DIY chicken prep station
 
Remove chicken from plastic and place in sink.  Remove giblets from chicken cavity and throw away, because these are gross.  (Alternatively, you can use these for stock or other recipes.)  Actually, I would like to thank Perdue because they wrap up the innards (sick) in paper, which makes it easy to remove everything without seeing any gore.  (But if you are curious then you can open the paper and peek inside, or just glance at the picture below.)
 
Giblets, up close and personal
 
Rinse the de-gibleted chicken, inside and out, under cold water.  Transfer to prep station and pat dry with paper towels.
 
In a deep roasting pan (I used a disposable, aluminum pan), arrange onion slices to entirely cover the bottom of the pan.  Transfer chicken to pan, standing it so that the cavity is facing up.  (I liked to call this the "headless zombie chicken headstand" position.)  Liberally sprinkle inside of cavity with salt and pepper; insert garlic, thyme and lemon in cavity.
 
Headless zombie chicken headstand
 
Spread softened butter over entire surface of chicken, including legs and wings.  Liberally sprinkle entire chicken with salt and pepper.  Arrange chicken in pan with breast facing up; plastic pop-up thermometer should be facing up.  Cross legs across cavity opening and tie with kitchen twine.  (Sewing thread will also work in a bind; I know from experience.)
 
 
Prepped and ready to roast
 
Add baby carrots around chicken, on top of onions.  Place pan in preheated oven and cook for 1 1/2 to 2 hours, or until thermometer pops up and skin is golden brown.  Martha suggests using an instant-read thermometer to ensure that the meat is at the correct temperature (180 degrees for breast and 190 degrees for thigh), but I didn't have one so I just trusted the plastic pop-up's read out.
 
Ta-da!
 
Remove chicken from pan and allow to rest on cutting board.  Strain onions and carrots from pan; set aside.  Pour juices from pan into a fat separator or large measuring cup - I don't have a fat separator so I poured the juices into a measuring cup then used a spoon to skim off the fat.  Add juice to a small saucepan and cook over medium-high heat for 1 minute.  In a small bowl, mix chicken stock and flour with a whisk until thoroughly combined.  With constant whisking, pour stock mixture into saucepan with juice.  Continue to whisk and cook for 4 minutes.  Remove from heat.
 
Carve chicken and serve with gravy.  Martha instructs people to discard the onions, but I served these as a side dish with the chicken.
 
Wing, breast or leg; your choice
 
Roasting a chicken was much easier than I had imagined and yielded really great results (you can see the juiciness of the meat in the picture of the breast, above).  In addition to trying a new cooking challenge, I pursued roasting a whole chicken because I thought it was budget friendly - only 99 cents per pound compared to chicken breast, which is usually 2.99 to 3.99 per pound.  The price might be a little misleading, though, given that a whole chicken also has bones and non-edible portions. I didn't measure how much meat I really got from the 7.2 pound chicken, but I'll be sure to do this next time and report back.
 
Good luck if you decide to roast a bird and stay tuned for a future post on how to use leftover chicken!

Thursday, October 25, 2012

Browned Butter and Orange Pumpkin Bread

Another day, another bread!  After baking Pumpkin Sugar cookies (from my last post!) I had half of a can of pumpkin puree that I couldn't let go to waste.  A number of ideas for the pumpkin ran through my head - soup, pasta, pizza, cake, cupcakes, muffins - but ultimately I decided to pursue a fall staple, pumpkin bread.
 
I have baked, and eaten, pumpkin bread made from different recipes and though I've never met a pumpkin bread that I didn't like, I can't remember any being particularly special.  So, when I was browsing Tastespotting for pumpkin bread recipes I zeroed in on recipes with unique ingredients.  One post that called out to me was the Messy Baker's Brown Butter Orange Pumpkin Muffins; I've had browned butter in other dishes before and loved it so I thought this recipe had great potential.  Based on my lack of muffin liners, and my laziness, I tried this recipe as a bread instead of muffins. 
 
Have you had browned butter before? I wish I could bottle the smell of browned butter, though that could put most of our possessions in jeopardy of being drooled on. The delicious smell even undersells the deep, rich flavor of it; I'm fairly confident that replacing regular butter with browned butter could enhance many savory and sweet recipes!  Browned butter certainly amped up this pumpkin bread, the result was so good that we ate most of the loaf before I thought to take pictures!

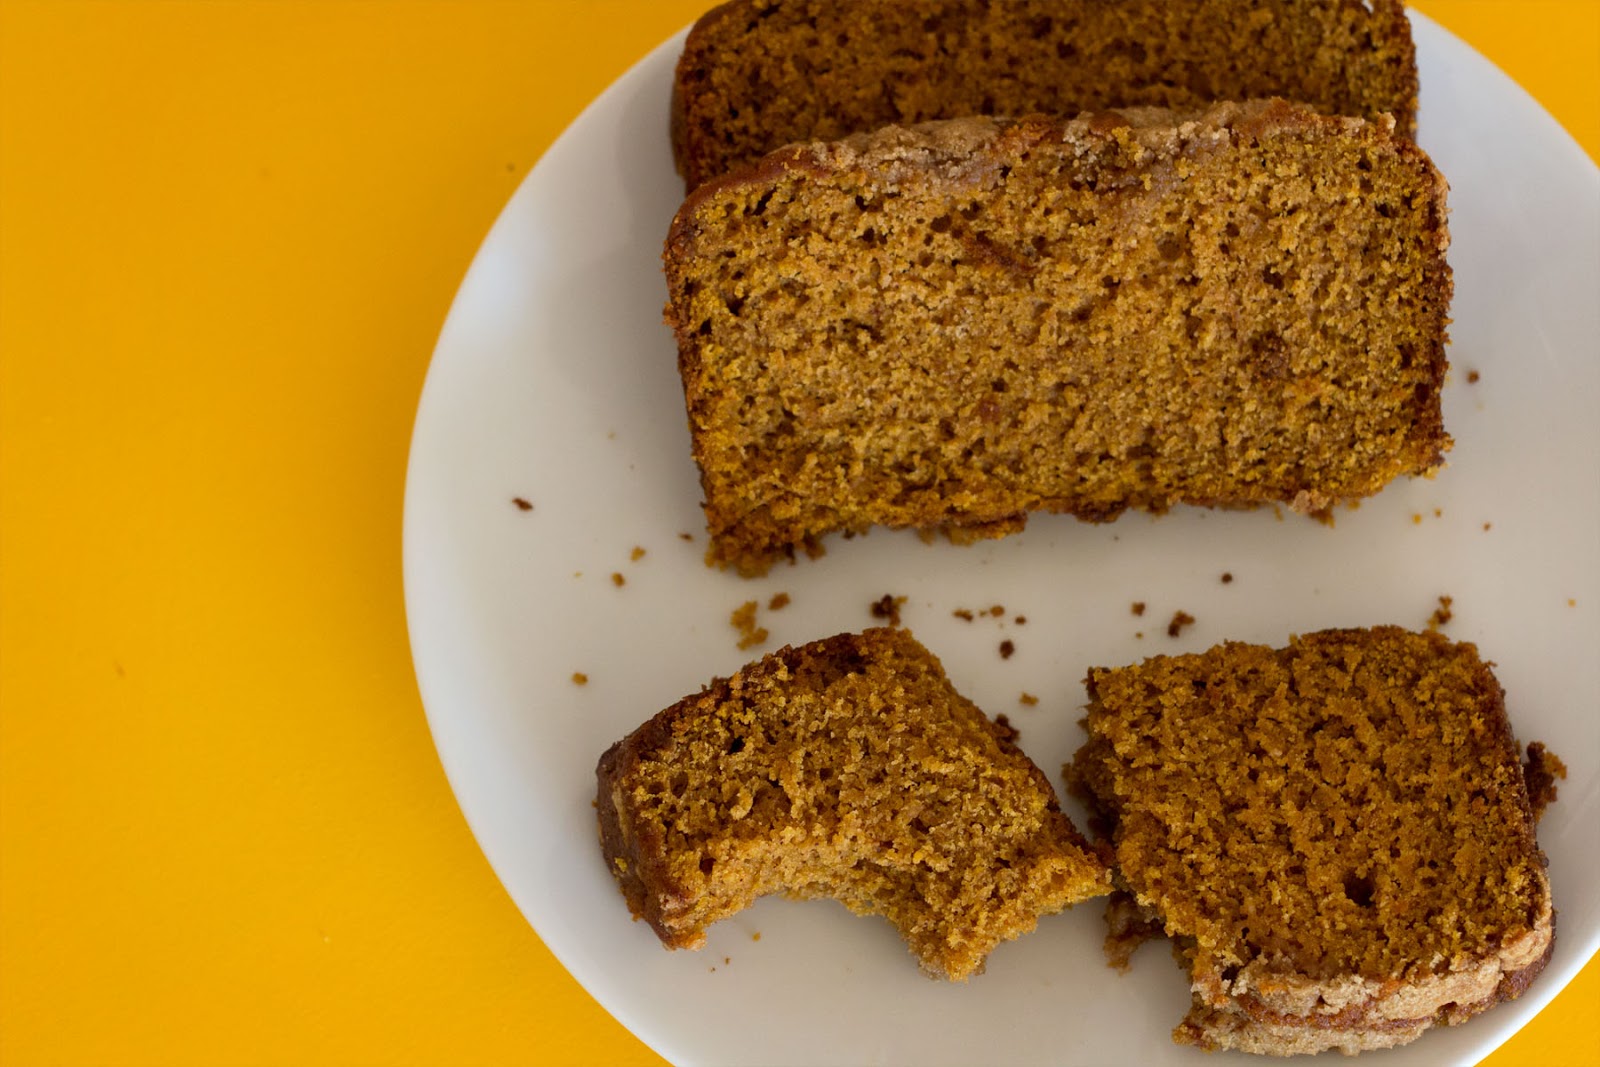
Browned butter pumpkin bread - So irresistible that only 3 slices remained by the time I grabbed my camera!
 
Browned Butter & Orange Pumpkin Bread
 
For the bread
1 3/4 cups flour
1 tsp pumpkin pie spice
1/2 tsp cinnamon
1 tsp baking soda
1/2 tsp baking powder
1/2 tsp salt
3/4 cup packed brown sugar
3/4 cup sugar
2 large eggs
1 stick of salted butter
1 cup pumpkin puree (not pumpkin pie filling)
1/3 cup orange juice*
 
For the streusel topping
2 tbsp salted butter, softened
1/4 cup brown sugar
1/4 cup flour
 
Preheat oven to 350 degrees. Prepare a loaf pan by spraying with cooking spray or greasing with butter.
In a medium-sized mixing bowl, combine dry ingredients - flour, spices, baking powder, baking soda and salt. Set aside.

Heat a small pan over medium heat, add stick of butter.  Without stirring, allow butter to melt and then bubble.  After about 5 minutes of bubbling, stir with rubber spatula.  Continue to cook with stirring until butter is a medium brown color.  Remove from heat and set aside.

Stages of browning butter.  Don't let it burn!
 
Using a whisk, beat both eggs and sugars until smooth. Drizzle in browned butter, using a rubber spatula to get any browned bits that remain in the pan, and whisk until incorporated.  Add pumpkin and juice, mix thoroughly.  With a rubber spatula fold in dry ingredients until combined. Pour batter into prepared loaf pan and set aside.
 
Too bad blogs don't have smell-o-vision; adding the butter smelled amazing!
 
In a small bowl, mix ingredients for streusel topping using a fork.  Topping should be crumbly; when mixed sprinkle over the top of the batter in the loaf pan.

Bake for 50-60 minutes, or until cake tester inserted in the middle of the bread comes out clean.

All done!  The streusel ends up baking in, not as a crumb topping.
 
*Unfortunately, I couldn't detect the orange flavor in the finished bread.  When making this again I may try to amp up this flavor, possibly by using concentrated juice (e.g. reduce 1 cup of orange juice down to 1/3 cup) or adding orange zest.  I suppose orange extract could be used as well, but I can't recommend how much to use since I haven't tried it yet.
 
I hope you try this pumpkin bread, I know I'll be making this again as well as trying to find new recipes that use browned butter!


Wednesday, October 24, 2012

Easy Pumpkin Sugar Cookies

Packing up our kitchen in St. Louis was no easy feat; not only had I accumulated various gadgets, tools and dishes but I had also created quite a collection of "specialty" food items.  By speciality I don't necessarily mean fancy or exotic, but rather items that were for occasional use.  For example, we didn't eat lemon curd or meringue powder on a daily basis but every once in a while I was inspired to make macarons or royal icing-decorated sugar cookies.  So, while packing to move to an apartment that would have considerably less cabinent space I had to make some important decisions on which items to pack and which to throw out.  It was heartbreaking.  (Don't even get me started on all the sauces, jellies, and other refrigerator items that I had to part with based simply on the fact that there was no car space to sacrifice for a cooler full of hoisin sauce and pomegranate jelly.)
 
Two of the pantry items that moved to Boston with us were a can of pumpkin puree and a packet of Betty Crocker sugar cookie mix.  How did these make the cut?  Pumpkin is always good to have around in the fall and the sugar cookie mix was going to expire soon, so I knew that would motivate me to use it.  And motivated I was...or would have been if I hadn't gotten on a "healthy eating" kick.  So that I wouldn't break my diet I put off making the cookies for a while (you see, I have no willpower to avoid yummy foods so I try to just not keep them around).  However, I knew that the mix would expire so I started to think of ways to make the cookies a little less unhealthy.  I remembered when I was younger that my mom would use applesauce in place of oil when baking brownies so I considered this option.  Then I had a better idea - use that can of pumpkin as a fat replacement and to bring a new flavor to the cookies!  So, that's what I did.
 
All the makings of an easy pumpkin sugar cookie

The recipe below is a slight tweak on Betty's normal preparation directions and yields pumpkin-y, spiced sugar cookies.  I replaced half of the called-for butter with pumpkin puree to bring down the fat and calorie content of the cookies.  In baking, butter (or other fat) is important to texture so I didn't want to remove all of the fat; this was probably a good choice because replacing even just half the butter content resulted in cookies with a cake/biscuit-like texture.  No big deal though, the flavor was still good!

Pumpkin Sugar Cookies
1 17.5oz package of Betty Crocker Sugar Cookie mix
1 1/2 tsp pumpkin pie spice
1/2 stick of butter, room temp
1/4 cup pumpkin puree
1 egg
Sugar, for coating

Preheat oven to 350 degrees.  Prepare a baking sheet by greasing or lining with parchment paper/silicone mat.  Place some granulated sugar in a small bowl and set aside.

In a medium mixing bowl, combine cookie mix and pumpkin pie spice.  Add butter, pumpkin puree and egg; stir with a rubber spatula until all ingredients are evenly incorporated. 


Drop dough by rounded teaspoon into bowl of granulated sugar, coat with sugar and place on baking sheet.  (Flattening the dough into discs is recommended, but not necessary).  Because of the decreased butter content, cookies will not spread much during baking; dough can be placed about 1 inch apart on baking sheet.

Cinnamon-sugar never hurt anything!

Bake for 7-11 minutes, or until golden brown.  Remove from oven and cool on wire rack.  I hope you enjoy!

Saturday, October 20, 2012

Banana Toffee Nutella Bread (Alternative title: I'm sorry I'm a lazy blogger)

Didn't I used to have a blog?   Wait, do I still have a blog?  Crap, I do...and I haven't updated it in 6 months.  SIX MONTHS?!?   I'm the worst blogger ever.
 
It's not like nothing has happened in the past 6 months that is worth posting; exactly the opposite, actually.   Since my last post we traveled to Europe, Jim defended his thesis and graduated from Wash U, I traveled to Hilton Head Island with friends, family & friends celebrated Jim's graduation at a fun party, we traveled to Boston to find an apartment, I gave my resignation at Sigma, we celebrated my birthday, I had my last day at work, we visited with friends and family, and we moved to Boston.   Phew, I guess that's why I haven't posted anything since April!
 
However, since moving to Boston I really don't have an excuse for not updating the blog because I haven't been working.  Instead, I've been getting our apartment together, exploring our neighborhood, cooking/baking, and doing fun Pintrest projects.   Oh, I've also been trying to find a job but all those other things are just so much more fun!   Because I've had the opportunity to do some cool things lately, I've decided to pick up the whole blogging thing again, just in case anyone wants to see what I've been up to and maybe get some ideas for fun activities/projects.  I have been trying to be diligent about taking photos of what I've been doing so there are a number of posts that I have on the docket...get ready!
 
In keeping with the blog's title, I'll get back into the swing of things with a "sweet" post - a recipe for banana toffee nutella bread.  Since that is a mouthful of a name, I wanted to come up with a shorter name, like "banafee nutella bread" or even "banafeetella bread".  Both good ideas in theory, but out loud they sounds weird so I'll stick with the long name (Note to self: do not go into advertising, people will not understand your weird ideas.)  When I headed to the kitchen to bake I initially planned on making regular old banana bread; however, I found a jar of Nutella hiding behind the brown sugar and thought that incorporating it with banana could be good (think banana Nutella crepes!).  I had seen marbled pumpkin bread on Tastespotting and decided to apply the marbling technique to my bread, using part banana bread batter and part nutella-flavored batter.  As a last minute addition I also threw in some crushed Heath bar, mostly so that I wouldn't scarf it down in some future willpower-deprived eating spree.  I hope you try and enjoy this recipe!

Banana Toffee Nutella Bread

1/2 cup sugar
1/2 cup packed brown sugar
8 tbsp (1 stick) salted butter
2 large eggs
2 cup flour
1 tsp baking powder
1 tsp baking soda
1 tsp salt
3 ripe bananas
1/2 tsp vanilla
1 tbsp milk
1/2 tsp cinnamon
1 Heath bar, crushed
3 tbsp Nutella
1 tbsp milk

Preheat oven to 350 degrees.  Prepare a loaf pan by spraying with cooking spray or greasing with butter.  (Even though I used a non-stick Calphalon loaf pan, I still greased it to make sure the bread would come out clean!)
 
In a medium-sized mixing bowl, combine flour, baking powder, baking soda and salt.  Set aside.
 
Using a stand or handheld mixer, cream butter and sugars until fluffy.  Add eggs one at a time, mixing to incorporate after each addition.  After adding eggs, gradually add flour mixture (keep the bowl for the next step!) and beat until thoroughly mixed.  Set batter aside.
 
Add the bananas, vanilla, cinnamon and 1 tbsp milk to the medium-sized bowl (that held the flour); mash together until no large lumps remain.  Stir in crushed Heath bar.
 
Divide batter in half; add half to banana mixture and stir with a rubber spatula to combine.  Pour banana toffee batter into prepared loaf pan.  To remaining batter, add Nutella and 1 tbsp milk; stir with spatula to combine.  Pour or spoon Nutella batter on top of banana toffee batter.  Using a rubber spatula or knife, gently pull batter from bottom to top and side to side; this will create the marble.  *Don't over mix at this point or else the bread will end up as a singular bananatoffeenutella batter instead of a marbled bread.
 
Bake for 50-60 minutes, or until cake tester inserted in the middle of the bread comes out clean.
 
Enjoy!
 
Banana Toffee Nutella bread, too tasty to calculate calories!
 

Sunday, April 15, 2012

Oops, I did it again...

I played with your heart...and didn't blog for a whole month. Crap.

This time I have (somewhat of) an excuse, besides just being lazy. Over the past month I've been spending my extra time doing internet-independent things, like spending more time outdoors, reading and...doing other stuff that just isn't blogging, I suppose. When I have been able to get to my computer I have had other, higher priority things to use the internet for, like research our impending vacation! We leave in less than two weeks for a trip to Amsterdam and Paris - I can't wait!

To try and ease myself back into blogging, I'll be making this a short and sweet post dedicated to the cutest dog in the world, whose birthday was this past week.  After a recent trip to the spa (dog groomer) I took Charlie to play in our back yard and noticed that the light was perfect for photos!  Some of the images turned out looking very formal, like senior portraits.

Charlie Mohan, Class of 2012

But eventually Charlie lost his interest in being incredibly good-looking and instead wanted to play.  Have I mentioned that Charlie has a crippling addiction to fetching tennis balls?  We actually have a theory that he doesn't really enjoy fetching but rather has obsessive-compulsive disorder that drives him to retrieve the ball every time its thrown.  This diagnosis is based on the fact that even if it is too hot out (which is over 70 degrees for the pup) and Charlie is pathetically splayed out on the grass panting, he will run after the ball if its chucked.  Poor OCD dog, I'm sorry you're a little bit crazy (probably inherited it from me).

This sequence is on repeat any time a tennis ball is around

So, as I mentioned, Charlie recently celebrated a birthday.  We celebrated his third birthday on Wednesday with a trip to Dairy Queen.  Charlie absolutely loved his vanilla ice cream and provided a great deal of entertainment when trying to get the last licks from the flimsy plastic container...I'm sure at that point his birthday wish was for thumbs (or that his stupid owners would hold the damn cup for him).  Also entertaining?  Jim's concern over Charlie getting brain freeze - he was certain that Charlie would hurt himself so a couple times he separated Charlie from the ice cream.  This would last for a few seconds until Charlie wiggled his way free and beelined back to the prize.

Lay off me, I'm starving!

I'll try to blog again soon, I have a couple recipes that are worth passing along!

Saturday, March 17, 2012

Blog? What blog?

It has been over a month since I last posted on the blog...you could say I've just been taking my sweet time getting around to it (get it?).  During this time I've still be cooking, baking, taking photos of things, but I just haven't been able to get around to blogging any of it.  And by "been able to get around to" I really mean I have been too tired/lazy/etc.  I know my many loyal followers have been antsy for a post (<-- sarcasm font), so here it is and it is sweet...literally!

Chocolate Chip Cookie Dough Cupakes

I recently stumbled upon a new blog that I immediately fell in love with - Bake at 350.  This blog has amazing ideas, recipes, tutorials and has completely inspired me to try new things in my baking.  One recipe that grabbed my attention was that for Chocolate Chip Cookie Dough Cupcakes, so I desperately looked for an excuse to make them (since I can't bake just because...that is how I end up with half as many baked goods as intended and a childlike sugar-induced stomach ache).  Fortunately, Jim had a Sunday lab meeting one weekend so I was able to make these cupcakes and cast them out of the house...after trying just a bite of one, of course!

The final result was a chocolate chip cupcake topped with brown sugar cookie dough frosting.  The inspiring blog post provides a recipe for filled and frosted cupcakes, but since I was sending these to a group of scientists who actively study diabetes (albeit Type 1 diabetes, which is not the type that can be induced by diet) then I scaled back and did not include the filling.  I also was probably just a little bit lazy, too.  Nonetheless, the cupcakes turned out amazingly! 

The actual cakes themselves were literally the most perfect-looking cupcakes I have ever made; I'm not sure if this is a function of the recipe, batter level in the tray, or some other variable but I was excited to see such pretty little domes.  They were quite tasty too - moist and light with a subtle flavor that allow the frosting to be the star of the show...and boy was that frosting a star!  I don't know why I didn't expect more out of the frosting when I first saw the recipe, but it really does taste exactly like cookie dough!  Trying a bit of the frosting transported me back to the special times that my mom would buy us refrigerated cookie dough and let us eat it without baking any cookies at all (back before the days that I knew, or even had to know, what a calorie was!).  Taken together, this cake and frosting combination is delicious and I can see why Bake at 350's son asked for these as a birthday treat!

Not too flat, no "muffin top", golden brown domes - perfect!

 Chocolate Chip Cookie Dough Cupcakes (from Bake at 350)

For the cupcakes:
3 sticks of butter*, room temperature
1 1/2 c. brown sugar, packed
4 eggs
2 2/3 c. flour
1 tsp baking powder
1 tsp baking soda
1/4 tsp salt
1 c. milk
2 tsp vanilla
1 c. chocolate chips

*Even though most baking recipes call for unsalted butter, I usually use salted butter because I feel like it can balance out sweetness sometimes.

Preheat oven to 350 degrees and prepare a muffin tin with cupcake liners.

In a separate bowl, whisk dry ingredients (flour, baking powder, baking soda and salt) together.  Set aside.  With a stand mixer or an electric handheld mixer, cream butter and brown sugar on medium-high speed until fluffy.  Add  vanilla and eggs (one at a time); beat until incorporated after each addition.  While mixing on low speed, add flour mixture in 3 batches, alternating with milk.  Using a rubber spatula, fold in chocolate chips.

Fill lined cups two-thirds full with cupcake batter.  Bake for 10 minutes, rotate pan, and bake for another 10 minutes (20 minutes total) or until a cake tester inserted in the center of a cupcake comes out clean.  Cool cupcakes completely before decorating with frosting (recipe below).

For the frosting
3 sticks butter, room temperature
3/4 c brown sugar, packed
1 lb (16 oz) powdered sugar
1/2 tsp salt
3 tbsp milk
2 1/2 tsp vanilla
Mini chocolate chips*

*The original recipe doesn't include chocolate chips in the frosting.  I added chips to transform the frosting from "brown sugar cookie dough" to "chocolate chip cookie dough".  Unfortunately the chips caused a bit of a problem during decorating when they occasionally clogged the tip of my pastry bag, so I can understand why they weren't in the original recipe.  However, they tasted good in the frosting so I'm glad I included them.  I would recommend using mini chocolate chips to avoid clogs during decorating.

With a stand mixer or an electric handheld mixer on medium-high speed, cream butter and brown sugar until fluffy (about 5 minutes).  Reduce speed and slowly add powder sugar; mix until just incorporated.  Add salt, milk and vanilla; mix to combine.  Transfer frosting to a pastry bag fitted with a large round tip and frost cooled cupcakes.

Delicious, but now I want a cupcake!

I have more blog posts up my sleeve, hopefully I can get some momentum going again!

Thursday, February 9, 2012

Quick, use it or lose it!

Occasionally I run into a situation in which I need to use perishable foods before, well, they perish.  This is usually the result of over-ambitious dinner planning plus laziness ("This week I'll make dinner every night!" followed by "I'm too tired tonight, can you eat leftovers instead?").  The following recipe came from a situation like this - I ended up needing to use a pound of chicken breast before it went bad!  I browsed some chicken salad recipes on the web and chose two to guide me in the the flavors and/or amount of different components to use.  The Fancy Schmancy recipe inspired me to include apple cider and vinegar while the Chicken 'n Apple recipe helped me to determine the amount of ingredients to use.  Though both recipes looked good, I had to improvise a bit based on what was hiding in my fridge and cabinets.  Somehow, from all of this, a pretty decent (and healthy) chicken salad emerged!

Impromptu Chicken Salad (guided by the recipes listed above)

1 lb chicken breast
2 tbsp finely chopped red onion
1 1/2 tbsp apple cider vinegar
1 1/2 tbsp honey
1/4 cup fat free plain yogurt
1/4 cup light Miracle Whip
2 tbsp Dijon mustard
1/4 cup dried cranberries, roughly chopped
1/4 cup pistachio nuts, roughly chopped
1/2 Fuji apple, chopped into small chunks

Fill a large saucepan with water and bring to a boil.  Add chicken breast and boil until no longer pink in the center (I can't remember how long this took...maybe 10-15 minutes?); remove from pan and set aside to cool.  In a small bowl, combine vinegar and honey; whisk together until mixed.  Add red onions and set aside to marinate.  In a separate bowl, combine yogurt, Miracle Whip and mustard; mix to combine and set aside.

When chicken has cooled, cut into small cubes or shred using a fork and knife.  Add chicken to yogurt mixture and toss to completely coat.  Add onions (including marinating liquid), cranberries, pistachios and apples; mix thoroughly.

Makes 6 servings, approximately 210 calories per serving

Chicken salad is a healthy lunch option!


I served this to Jim on toasted sourdough (verdict = good) and I have enjoyed it as a topping on an avocado half or as a sandwich on a multi grain skinny bun!

Sunday, February 5, 2012

Quick and easy dinner: Southwestern Chicken and Rice

As I've mentioned in previous posts, the January/February 2012 issue of Cooking Light contains quite a few good recipes.  I was particularly impressed with the recipes in the issue's feature ("25 Healthy Chicken Dinners") and intend on trying many of them.  To kick off the tour de chicken recipes, I made a southwestern chicken and rice skillet dinner.  The original recipe called for processed Pepper Jack cheese (e.g. Velveeta Pepper-Jack) but I couldn't find this at the grocery store so I substituted a southwestern-spiced cream cheese product.  I also upped the amount of vegetables in the recipe by adding more red and yellow bell peppers as well as introducing green bell peppers.  The fresh veges looked (and smelled) so delicious; I think next time I'll add even more!

Bell peppers and onions, so healthy and satisfying!

This chicken dish was so easy to prepare and to serve - no additional sides required because the dish contains all the vegetables and starches that a complete meal needs!  Besides being easy and tasty, the serving size of this dish also hits at just the right caloric value for dinner.  All that said, I will definitely make this again in the future!

Southwestern Chicken and Rice (Adapted from Cooking Light's Chicken and Rice)

2 cup white rice
16 oz chicken breast, cut into strips
1 1/2 cup onion, chopped
1/2 red bell pepper, chopped
1/2 yellow bell pepper, chopped
1/2 green bell pepper, chopped
1 tbsp all-purpose flour
1 tsp cumin
3/4 cup chicken broth
1 container Philadelphia Sante Fe Cooking Creme
2 oz 1/3 Fat Cream Cheese, cut into small cubes
2 oz. Mexican blend shredded cheese

Preheat oven to 375 degrees and prepare an 11 x 7-inch glass baking dish by spraying lightly with cooking spray.

Spray a large skillet with cooking spray and heat over medium-high heat.  Add chicken and sauté for 1 minute or until no longer pink.  Remove chicken from skillet and set aside.  Add onion and peppers to pan and sauté for 5 minutes.  Stir flour and cumin into onion and pepper mix; cook for 1 minute.  Add chicken broth and stir until mixture is smooth; cook for 2 minutes.  Add cooking creme and cream cheese; continue to cook with stirring until cheese is blended in and mixture is smooth.

Remove skillet from heat and add chicken and 2 1/2 cup cooked white rice.  Transfer chicken and rice mixture to baking dish; sprinkle shredded cheese to cover.  Bake for 25 minutes.

Makes 6 servings (serving size is about 1 1/2 cups), approximately 440 calories per serving

Southwestern Chicken and Rice casserole

Hm, writing this post has made me hungry...I think its time to make this recipe again!

Saturday, February 4, 2012

Another use for sweet potatoes - in dessert!

When I recently made sweet potato hummus it was out of necessity - I had four sweet potatoes that had been sitting around for far too long and I didn't want them to go to waste.  So, during prep for the hummus I baked all four medium-sized potatoes with the intention of using two for hummus and two for...something else.  It took a few days, but I decided to use the remaining sweet potatoes for cupcakes! 

Sweet potato and apple cupcakes with brown sugar goat cheese frosting

I had a flavor combination in mind for the cupcakes (sweet potatoes, ginger, cinnamon) and for the frosting (I had been wanting to make a goat cheese frosting for a while!) so I Googled "sweet potato cupcakes" and "goat cheese frosting" to find a recipe.  Unfortunately I didn't find a recipe that I completely wanted to use, but I did find a couple that I used as a starting point that I could modify to suit my taste.  I do this fairly often - find a recipe that looks pretty good and then tweak it to my liking.

I started with a sweet potato cupcake recipe from Martha Stewart's Cupcakes book (I seriously love this book, haven't made a bad cupcake from any of the recipes).  Martha's Candied Sweet Potato Cupcake (page 243) sounded really tasty, but I wanted to incorporate a couple more flavors so I browsed the internet to get an idea of just how much ginger I should add.  I stumbled upon a recipe for Apple Spice cupcakes and had an idea - add some apple to the cupcakes too!  I valued this idea for a couple of reasons - first, Jim is not a huge fan of sweet potatoes so I wanted to make sure the cupcakes didn't taste too strongly of them; secondly, I didn't have quite enough sweet potato for the Martha recipe!  (I knew I wanted to tone down the sweet potatoes so I also considered adding grated carrots to make a sweet potato-carrot cake fusion...maybe I'll try this in the future!)

As I mentioned earlier, I had been wanting to make a goat cheese frosting for a long time.  I had been going in circles in my head over what kind of cupcake/cake/cookie would work best with a goat cheese frosting and I had whittled my list down to a few options, with sweet potato cupcakes being one.  I knew I wanted to include some kind of flavor to tie into the cupcakes but I didn't want to make a spiced frosting (spiced cupcake + spiced frosting = too much spice) so I added some brown sugar to the frosting.  My father-in-law said the frosting was great, so I think the addition was successful!

Sweet Potato and Apple Cupcakes with Brown Sugar Goat Cheese Frosting

For the cupcakes (Recipe adapted from Martha Stewart's Candied Sweet Potato Cupcake recipe)
1 lb sweet potatoes* (approx. 2 medium potatoes)
2 cups all-purpose flour
2 tsp baking powder
1 tsp salt
2 tsp cinnamon
1/2 tsp nutmeg
1 tsp ground ginger
2 sticks butter, room temperature
1 cup sugar
1 cup brown sugar, packed
4 large eggs, room temperature
2 tsp vanilla
2-3 apples (I used Pink Lady apples but I think Fuji, Gala, or other baking apple would work)

Preheat oven to 400 degrees. Individually wrap sweet potatoes in foil and bake for 45-50 minutes, until tender. Remove from oven and allow to cool. Unwrap foil and remove peel.  In a bowl, mash sweet potatoes with a fork until smooth.  You should have about 1 cup of mashed sweet potatoes.  Set aside.
*I baked the sweet potatoes the night before and stored the peeled potatoes in tupperware overnight in the refrigerator.

Decrease oven temperature to 325 degrees and prepare a muffin tin with paper cupcake liners.

In a separate bowl, whisk dry ingredients (flour, baking powder, salt and spices) together.  Set aside.  With a stand mixer or electric handheld mixer, cream butter and sugars on medium-high speed.  When the butter mixture is pale and fluffy, add eggs (one at a time) and beat until completely incorporated.  Add mashed sweet potatoes and vanilla, beat until mixed.  Reduce mixer speed to low and add flour mixture in three batches, allowing for complete incorporation between additions.  Set aside cupcake batter.

Peel two apples (I used a vegetable peeler) and grate onto a double layer of paper towels using a large-holed grater.  If two apples do not yield about one cup of grated apple, peel and grate the third apple.  Gather grated apple in the paper towels and squeeze out the moisture (you'll be surprised how much juice can come out!).  Stir grated apple into cupcake batter.

Fill lined cups three-quarters full with cupcake batter.  Bake for 14 minutes, rotate pan, and bake for another 14 minutes (28 minutes total) or until a cake tester inserted into the center of a cupcake comes out clean.  Cool cupcakes completely before decorating with goat cheese frosting (recipe below).

For the goat cheese frosting (recipe adapted from Honey Goat Cheese Frosting recipe)
7.5 oz goat cheese, room temperature
6 oz cream cheese, room temperature
3 tbsp butter, room temperature
1/2 tsp vanilla
1 1/2 cup powdered sugar
1 cup brown sugar

With a stand mixer or electric handheld mixer on medium-high speed, cream goat cheese, cream cheese, butter and vanilla until light and fluffy.  Add powdered sugar and mix until combined.  Add brown sugar and mix until combined, making sure the sugar has dissolved and frosting is not grainy.  Transfer frosting to a pastry bag fitted with a large round tip (or a pastry bag with the tip cut off to leave about a dime-sized opening) and frost cooled cupcakes.

Enjoy!

Yes, I did take that bite of cupcake...purely for artistic purposes though, right?!


Thursday, February 2, 2012

Ready to run!

This post certainly does not contain "stop the presses!" content, but I just got new running shoes and had to photograph them...so I thought I'd share!

Have you ever seen cooler shoes?!

At the beginning of January I decided that I wanted to make a few changes...specifically I realized that I needed to replace my junk food & TV routine with something a bit healthier!  People always say that getting healthy isn't just about starting a diet or workout plan but rather it is a lifestyle change.  So, in January I committed to becoming a healthier person in many aspects - eating smaller portions of well-balanced nutritious food, exercising regularly, spending quality time with the people (and puppy!) that I love, and focusing on happiness! 

Its been about a month now and I'm happy to report that the transition to my new lifestyle is going great!  Researching and making new recipes has been a fun way to incorporate my cooking hobby with my goal of eating healthy.  I've gotten into the habit of working out almost daily and, surprisingly, I am actually enjoying it and look forward to exercising at the end of the work day!  Even more surprising is that I've discovered that I like to jog!  Even though I have done some running in the past, it was usually half-assed or the just to see if I could do it.  Recently I started going for jogs so I could spend some time in the beautiful (and freakishly un-winter) weather that we've been experiencing.  At first I jogged and couldn't wait to be done, then I jogged and decided "I don't hate this", and now I enjoy it! 

This brings me back to the point of this post (sorry for the life-goals detour...) - I bought new running shoes!  My running shoes were old and busted so I went to my local running store, Missouri Running CompanyFor years I wore Mizuno running shoes but my most recent pair were Saucony Kinvara 2, which are the lightest, most comfortable shoes I've ever worn.  That being said, my intention was to simply buy the same Kinvaras again.  Upon walking in the store I noticed that the Kinvaras were an awesome new color - bold purple and neon green!  I held my breath while the saleswoman checked for my size and did a little dance of excitement when she brought me the box.  Woo hoo!  These shoes are so awesome and beautiful that I had to take photos! 

My new best friends

I am super pumped to have new shoes and already they have inspired me to go for longer jogs!  Not only has the bright, bold look of these shoes motivated me but also the amazing fit has physically allowed me to jog farther.  I genuinely believe that having the right shoe makes a world of difference when setting out to run.  Before going to Missouri Running Company (previously Ghisallo Running) I used to buy shoes at stores like Kohls or Famous Footwear or Sports Authority.  These shoes are fine for hitting the elliptical machine or stationary bike, but I after visiting with knowledgeable staff at the running store I realized that it was the department store shoes that made my knee hurt.  My foot and gait were evaluated, I purchased actual running shoes, and went for a jog - no pain!  So, even though I love my new shoes, my recommendation is not to go buy yourself Kinvaras but rather visit a running store and buy your right shoe!  Run on!

Friday, January 27, 2012

Spinach, Artichoke and Tofu Stuffed Shells

A few weeks ago I bought the January/February 2012 issue of Cooking Light after flipping through the magazine and being delighted with how many recipes sounded good enough to try.  I use Cooking Light as a major source of "weeknight" meal ideas; recipes that are easy and quick enough for me to make after a long day of work (followed by walking the dog and, as of late, working out).  Also, besides being quick and easy, many of the recipes have solid "bases" that seems to allow for modifications to meet specific tastes or preferences.  One example of this is the recipe below that I modified from Cooking Light's Shrimp-Stuffed Shells.  Though it sounded good as-written, I though this would be a great recipe to turn meatless.  Don't get me wrong, I am definitely a meat eater, but in an effort to be healthier I've been trying to create one meatless dinner a week.  This goal gave way to the recipe below that uses artichokes, spinach and tofu (!) instead of shrimp.

Canned artichoke hearts are easy and tasty, just remember to rinse well and drain!

(!) Tofu?!?  Yes!  Though it may be a little foreign to some of you, tofu is actually a really nice meat replacement because it doesn't have much flavor of its own so it just absorbs the other flavors of the dish.  Also, silken tofu (used in this recipe) has a very soft consistency that allows it to be blended into other ingredients so that its undecipherable in the final product.  I will use a real life case study as my final selling point.  Jim is not a fan of tofu (as realized after a tofu stir-fry dinner, which actually was quite tasty) but he really liked these stuffed shells!  Try tofu!

Spinach, Artichoke and Tofu Stuffed Shells (adapted from Cooking Light)
24 uncooked jumbo pasta shells (20 to use for recipe, 4 as back up in case any tear!)
1 tbsp extra virgin olive oil
1/2 cup shallots, finely chopped
2 tablespoons minced garlic (I used jarred, can also use 6 cloves of fresh garlic)
1 cup chopped artichoke hearts (I used canned artichoke hearts, rinsed with cold water and drained)
1 1/2 cup fresh spinach, chopped
4 oz 1/3-less-fat cream cheese
8 oz silken tofu
1/8 cup grated Parmesan cheese
1/4 cup milk (I used fat-free milk)
1/2 tsp ground red pepper (I substituted ancho chili pepper for this, it’s a bit milder)
1/2 tsp dried basil
1 tsp dried oregano
5 tsp all-purpose flour
Cooking spray
2 1/2 cup tomato puree (you could also substitute your favorite tomato sauce)
1/4 cup grated Parmesan cheese

Stack spinach leaves and chop into ribbons

Preheat oven to 400 degrees.  In a medium skillet, heat oil over medium heat; swirl to coat.  When oil is warm, add shallots and cook for 2 minutes with occasional stirring.  Add garlic and cook 1 minute; stir constantly to avoid burning.  Add spinach and artichoke to pan; cook until spinach is wilted – about 2 minutes.  Add cream cheese, tofu, 1/4 cup Parmesan cheese, milk and spices; cook with stirring until cheese melts and mixture is smooth.  To thicken, add flour and cook for 1-2 minutes.  Remove from heat.

Coat a glass or ceramic baking dish with cooking spray.  (I used 8x8-inch dish and it was a tight squeeze but it worked.  A 13x9-inch dish can also be used.)  Cover the bottom of the dish with 1 cup tomato puree.  Fill 20 shells with a heaping spoonful of the spinach and artichoke mixture and arrange in a single layer in the baking dish.  Cover with remaining tomato puree and sprinkle with Parmesan cheese.  Bake for 25-30 minutes.

Makes 5 servings (serving size is 4 shells), approximately 355 calories per serving

Spinach, artichoke and tofu contained in a tomato sauced shell...delicious!

Overall I think this recipe modification worked out really well - it tasted like shells stuffed with spinach and artichoke dip!  We will definitely be having this again sometime!